78 Debugging in Rstudio
Tianxiang Li
78.1 Introduction
In the first assignment we were asked to find out how hist() in baseR determines the number of bins. Many students including me got confused because the return of the function is not the same as described in its documentation. I’d like to share how I solved the problem.
The tutorial mainly consists of three parts: how to use help(), how to find the source code of a function using methods(), and how to debug in RStudio. Hopefully this can help other people like me when they encounter similar problems in the future.
78.2 First Choice: help()
78.2.1 how to use help()
When you want to find out how a new function works, trying help() is always the first step. It will returns the official documentation of the function. Usually a detailed documentation will answer most of your questions. Take hist() for example:
help(hist)This will show you the documentation of hist() function. Here is a summarization:
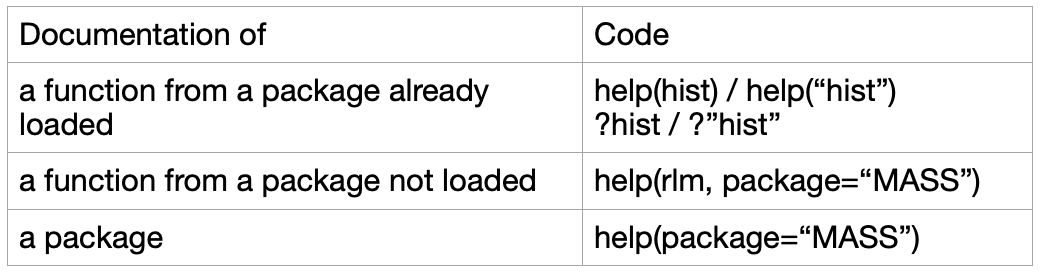
Note: The input of help() should be the name of the function, so you should use help(hist) instead of help(hist()).
There is also a function example(hist), which will return an interactive result where you can run some examples of the function.
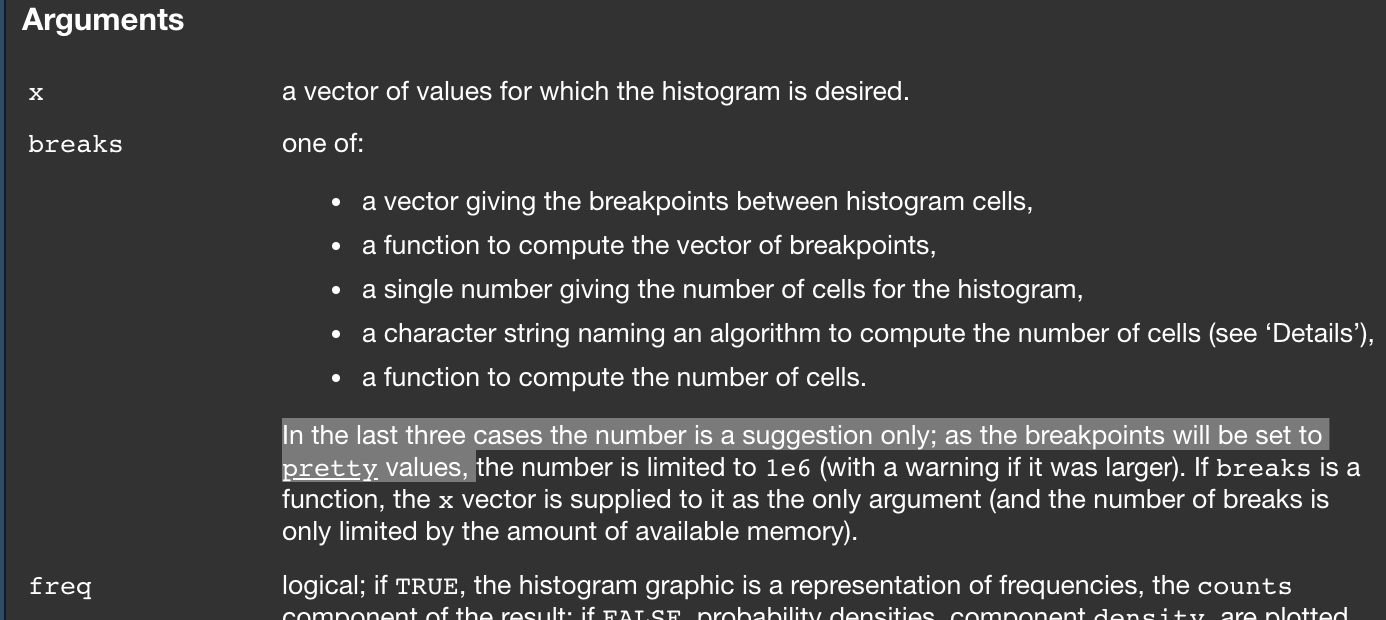
78.2.2 understand the documentation
The R documentation typically consists of several parts: Description, Usage, Arguments, Details, Value, Examples and so on. In Usage you can find the arguments and their default values. In Arguments there are explanations of these arguments. Value is the return value of the function. For example, hist() returns an object that has 6 attributes:
## List of 6
##  $ breaks  : num [1:10] 1.7 1.8 1.9 2 2.1 2.2 2.3 2.4 2.5 2.6
##  $ counts  : int [1:9] 2 4 7 6 6 4 2 2 2
##  $ density : num [1:9] 0.571 1.143 2 1.714 1.714 ...
##  $ mids    : num [1:9] 1.75 1.85 1.95 2.05 2.15 2.25 2.35 2.45 2.55
##  $ xname   : chr "mtl$asubic"
##  $ equidist: logi TRUE
##  - attr(*, "class")= chr "histogram"
78.2.3 not enough
However, R documentation cannot answers all the questions. In our case, the documentation of hist() only says that it uses Sturges’ algorithm, and uses it as a suggestion to pretty().
With this description, we still do not understand how it works: how to use the result of Sturges’ algorithm as a suggestion to pretty(). If we use pretty() directly, the results are clearly not the same as the results of hist():
pretty(mtl$asubic)## [1] 1.6 1.8 2.0 2.2 2.4 2.6To totally understand how a function works, the best way is to read
78.3 Source code: methods()
To totally understand how a function works, the best way is to read its source code. Since it is not include in the documentation, where should we find it?
Sometimes you can just type the name of the function. It will return the source code:
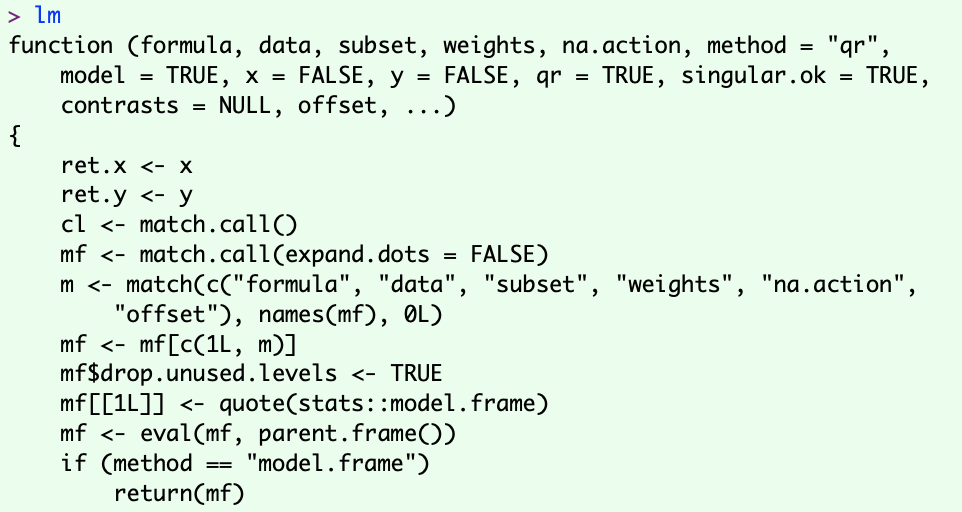
Unfortunately, when you try it on hist(), this happens:
hist## function (x, ...)
## UseMethod("hist")
## <bytecode: 0x5577d8d72ed0>
## <environment: namespace:graphics>This is because that it is a generic function (more specifically, it’s a S3 generic function). We can use methods(), it will list all available methods for a S3 or S4 generic function:
methods(hist)## [1] hist.Date* hist.default hist.POSIXt*
## see '?methods' for accessing help and source codehist.default is what we are looking for. Now we successfully get the source code of hist().
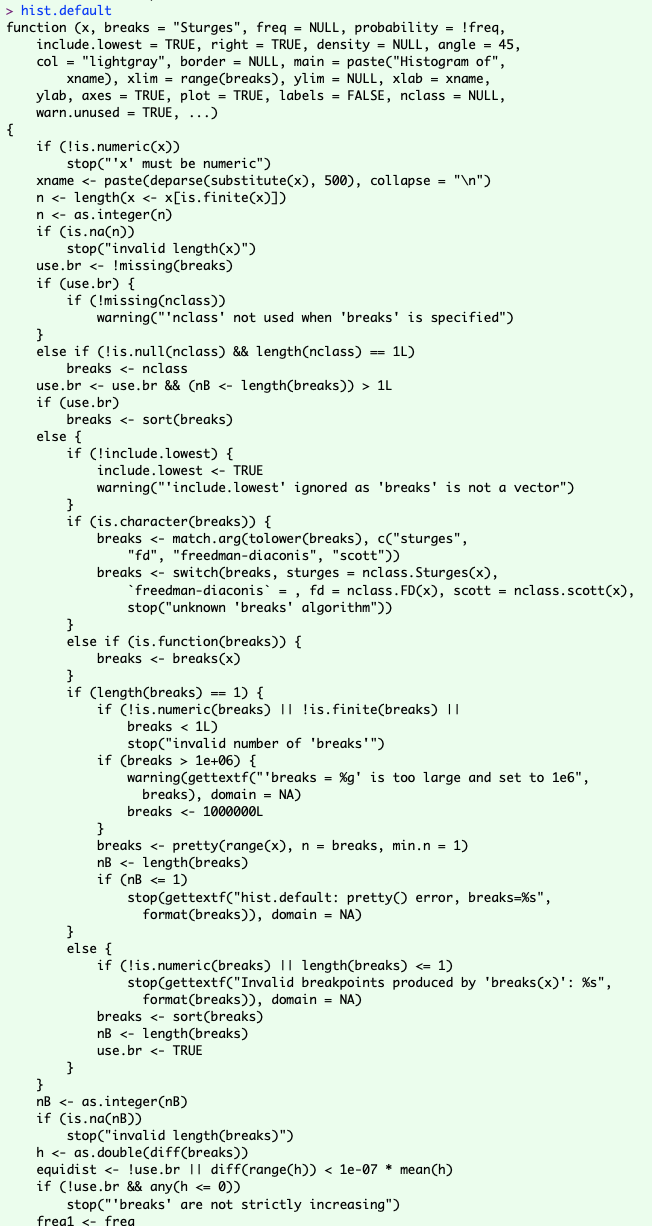
However, it still doesn’t solve our problem: the function is too long! It has 120 lines, including many if-else branches and exception handling. It will be painful to read all the contents of the function just to understand the basic usage of it.
This is when we should use the debugging tools built in RStudio.
78.4 Debugging in RStudio
Debugging is a very useful tool to understand the how your code behaves when it is actually running, or to find out why the code is not running as you expected. You can set a breakpoint before the line you are interested in, then when the code is running, it will stop at the breakpoint. Then you can run the code step by step to walk through it.
Now let’s see how to use debugging to find out how hist() works.
78.4.1 set the breakpoint
Firstly we need to set a breakpoint. To do this, you must create a R script file (you can’t do this in R markdown file). Then set a breakpoint by clicking on the left area of the line number. It looks like this:
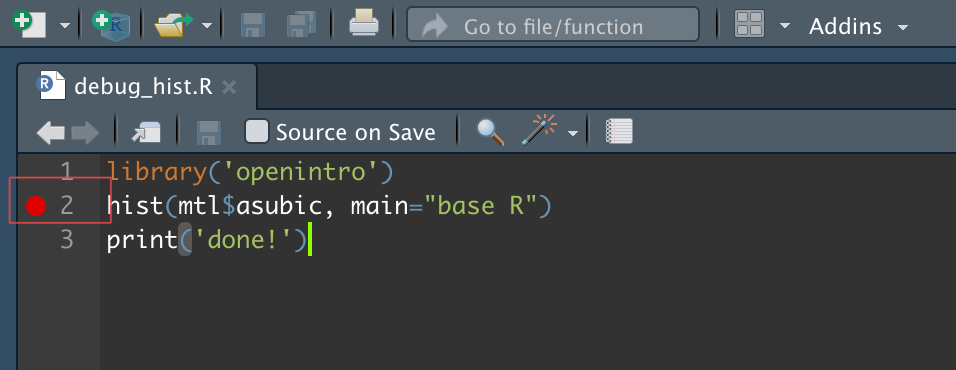
It means that it will stop after it runs line 1 and before it runs line 2.
78.4.2 run the script
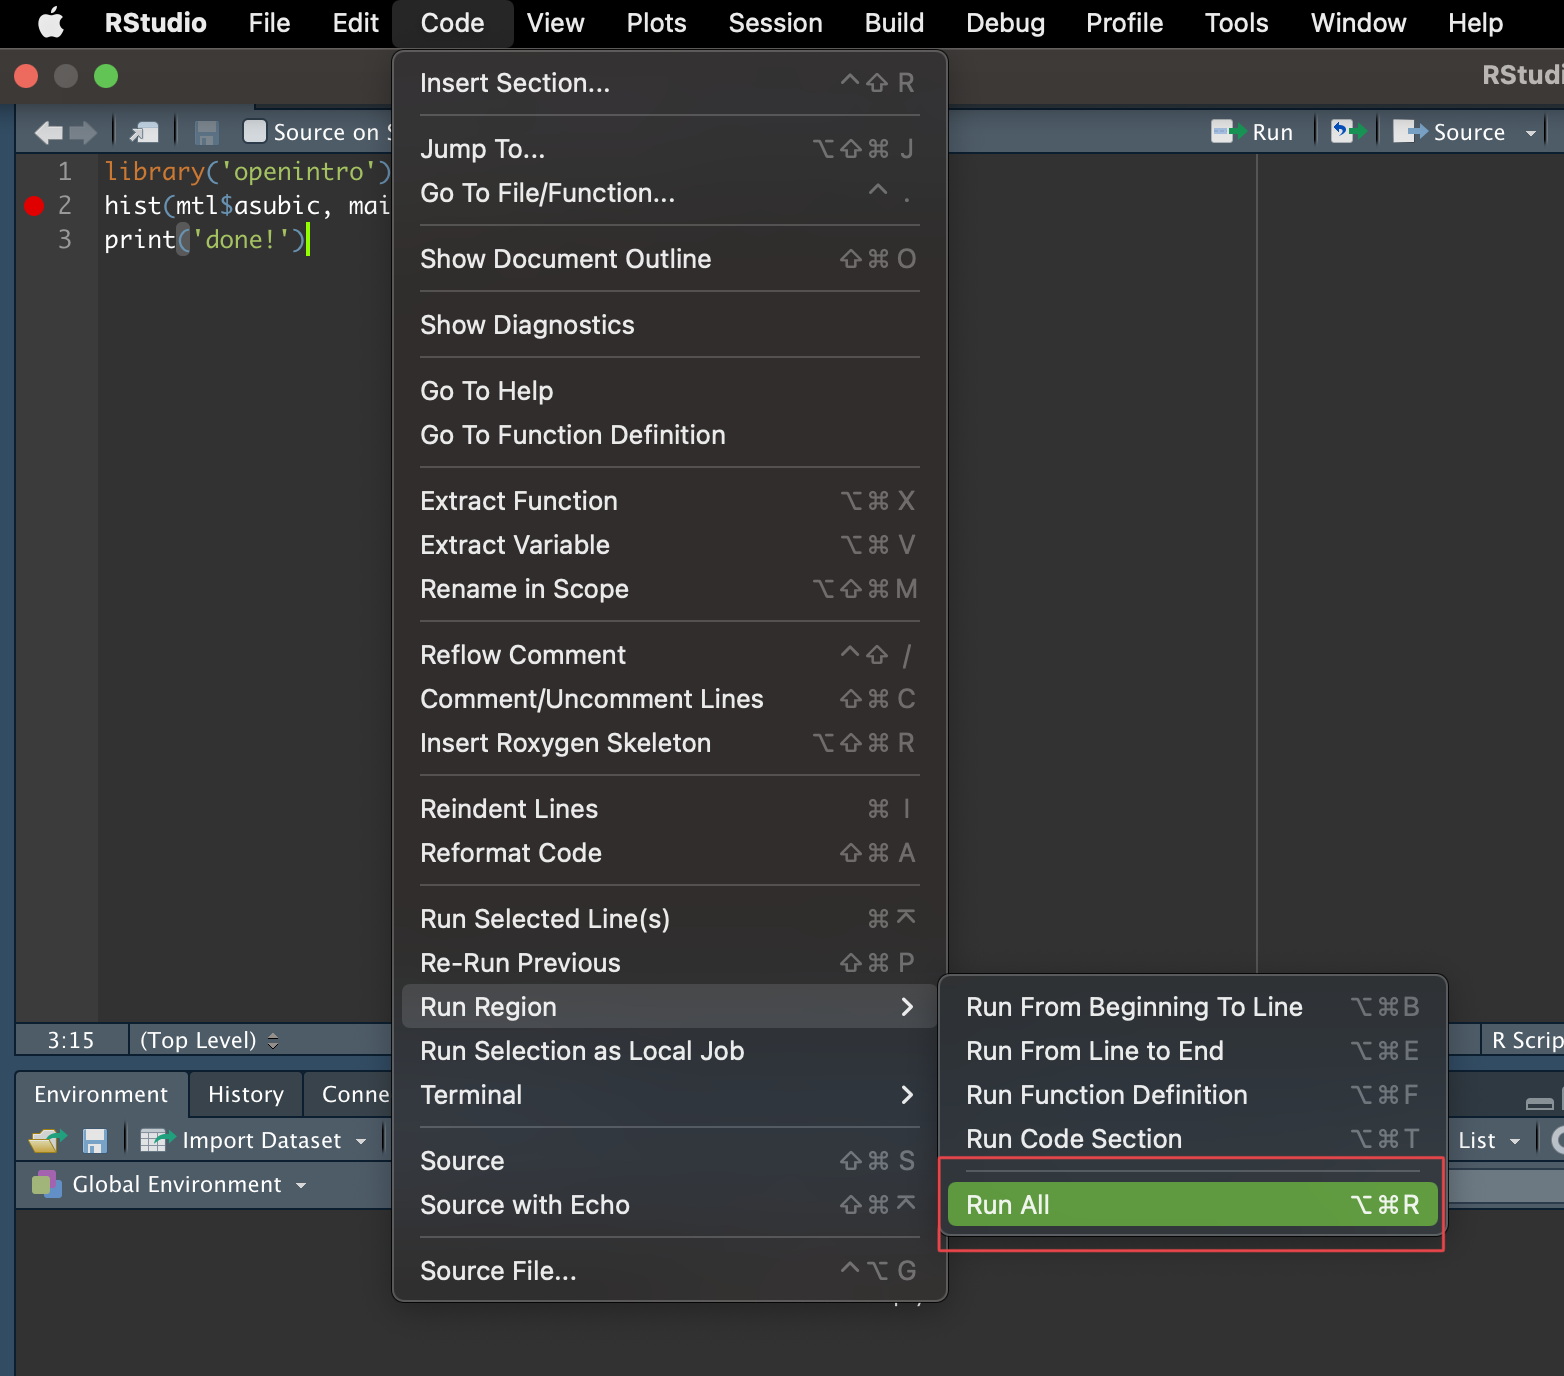
Save the script and run it through Code -> Run Region -> Run All:
Since you have set a breakpoint in step 1, it will automatically stop at that point!
78.4.3 debug
When it stops, it will go into debug mode and looks like this:
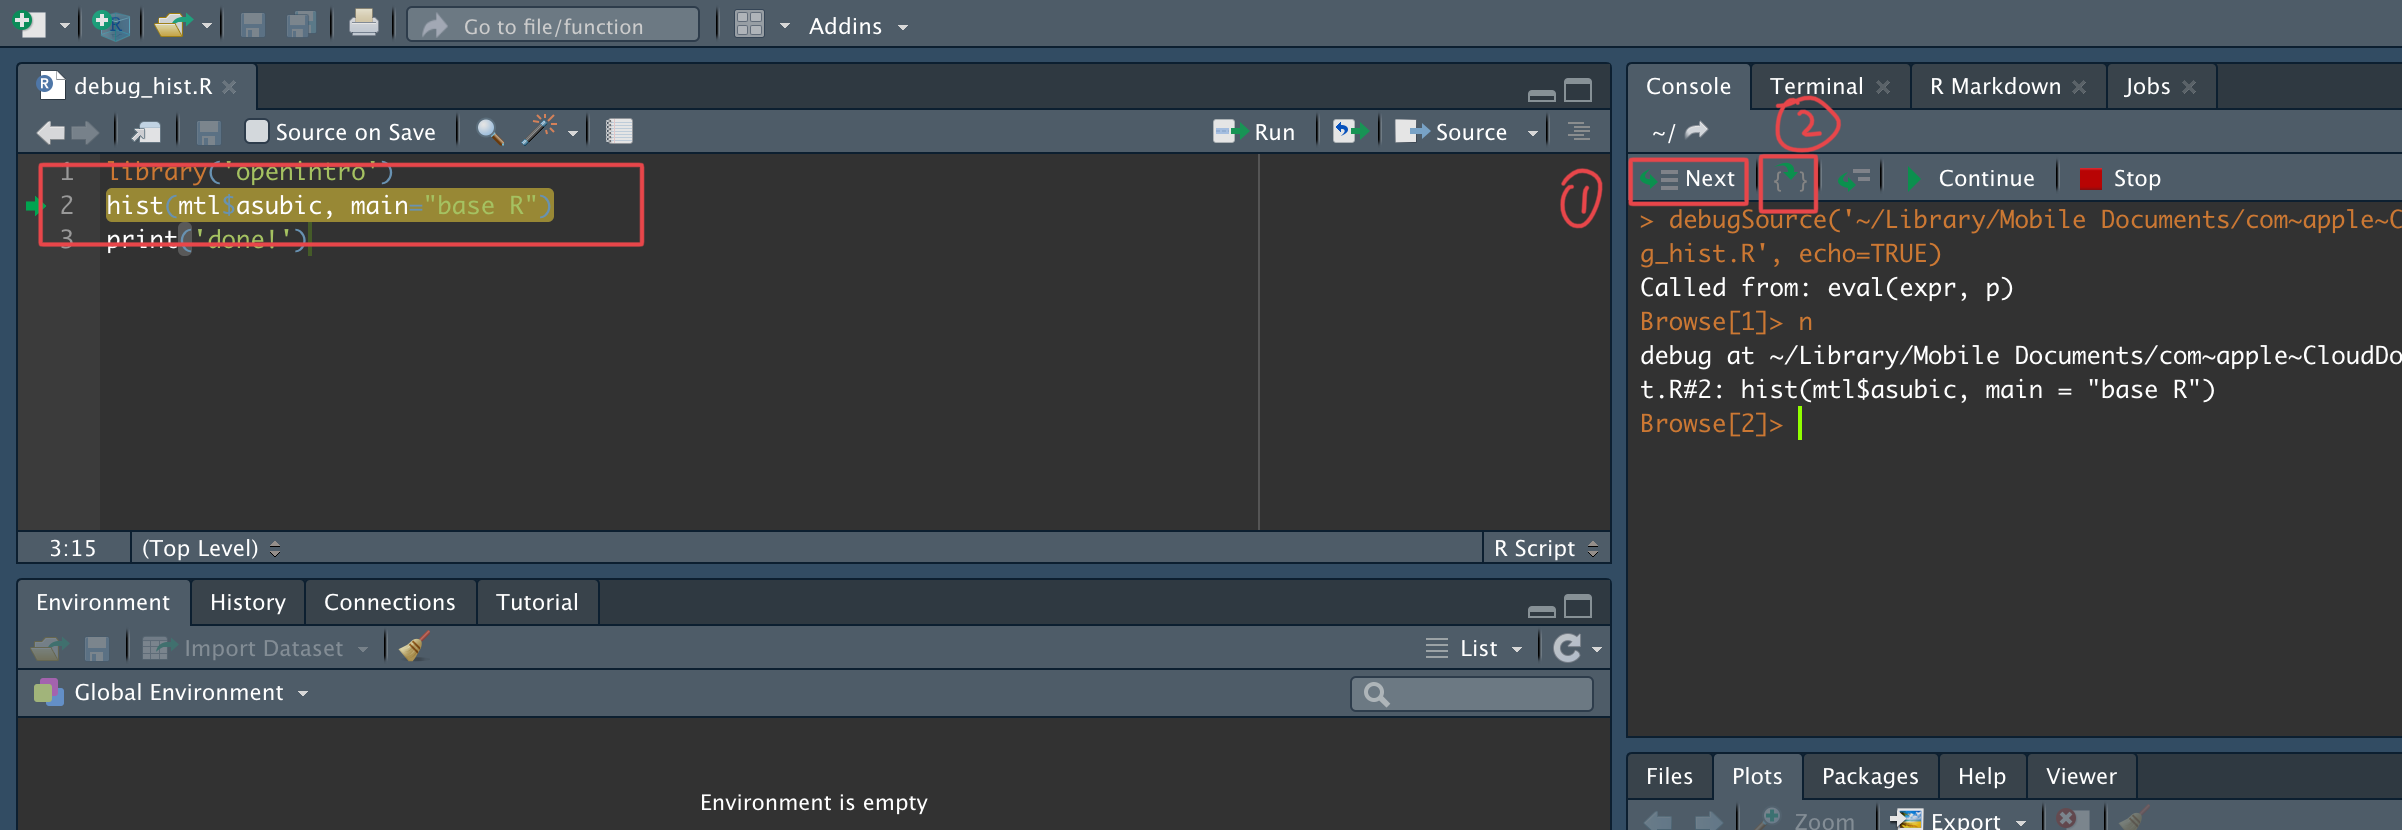
As shown in the picture, line 2 is highlighted, meaning that it will execute line 2 in next step (it hasn’t been executed yet).
Note that on the rightside some buttons appear in the Console. Button 1 means Execute the next line of code, button 2 means Step into the current function call. If you click button 1 it will execute line 2 and line 3 will be highlighted. Since we want to see the details of hist(), we should click button 2.
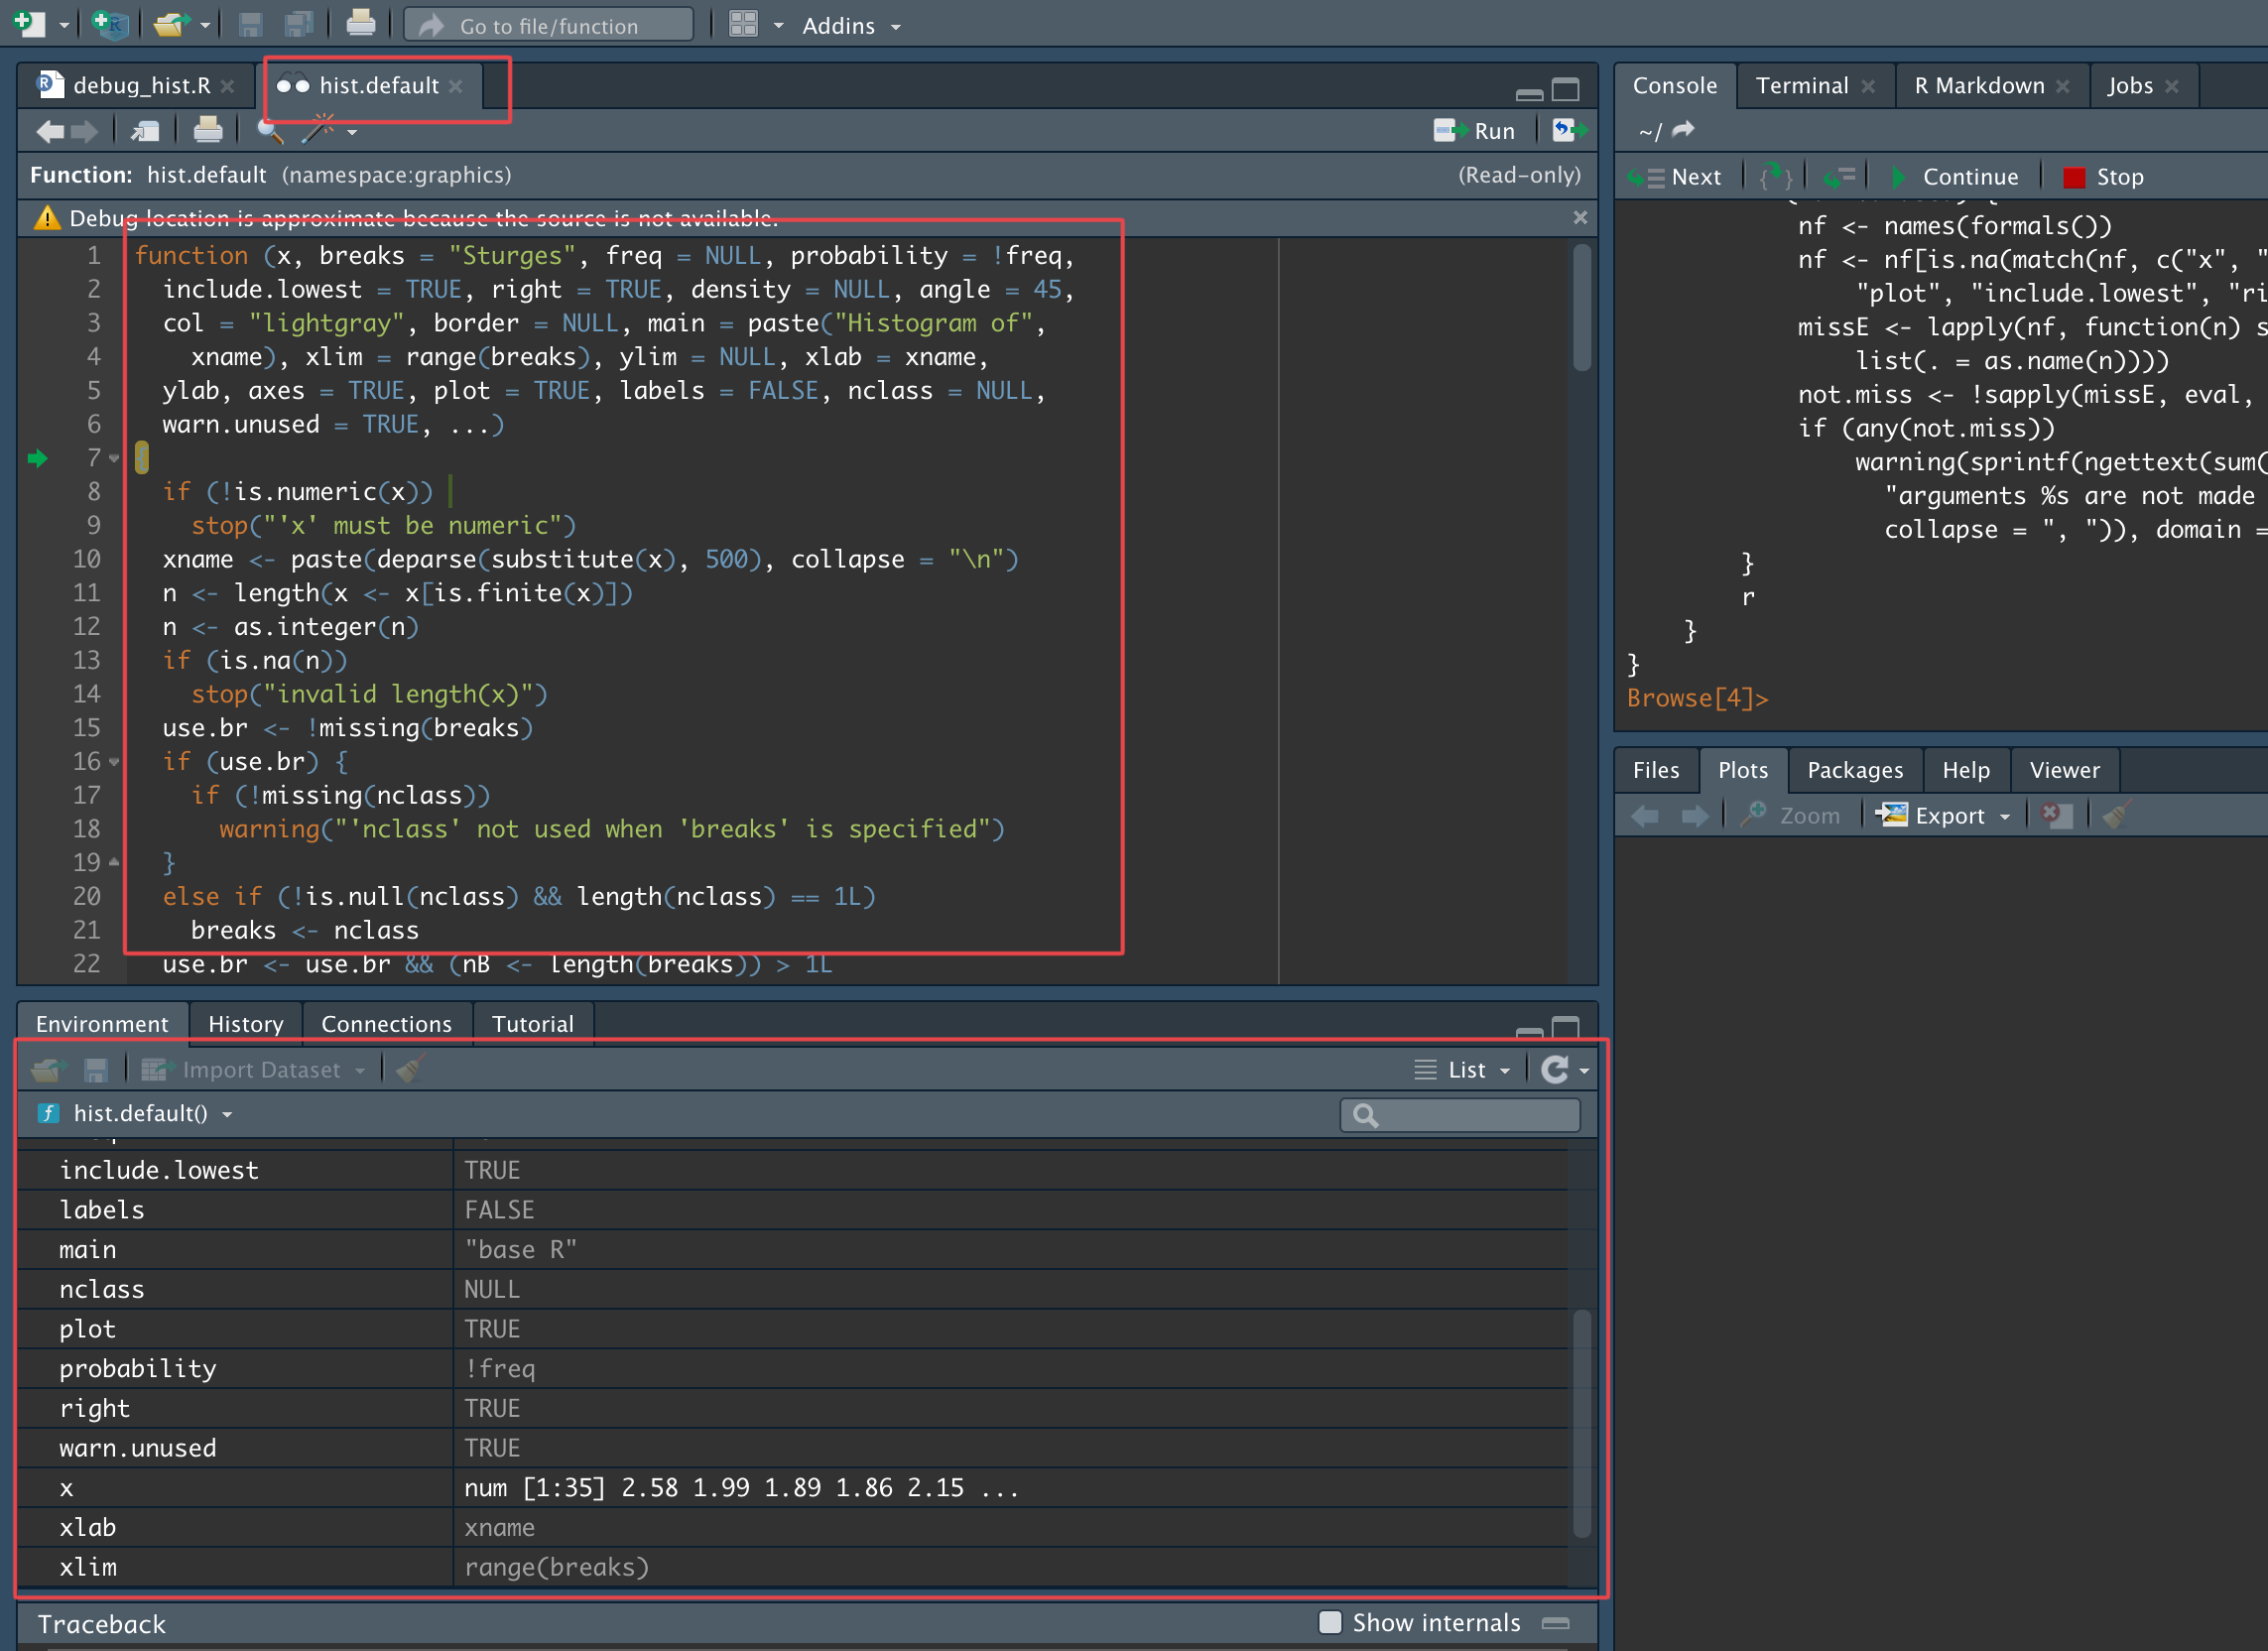
Again we find the source code of hist()! But this time, we know which line is being executed through the green arrow and highlight, and all the variables and their values in current step are shown in Environment.
Since we already step into the hist() function, from now on we click button 1:
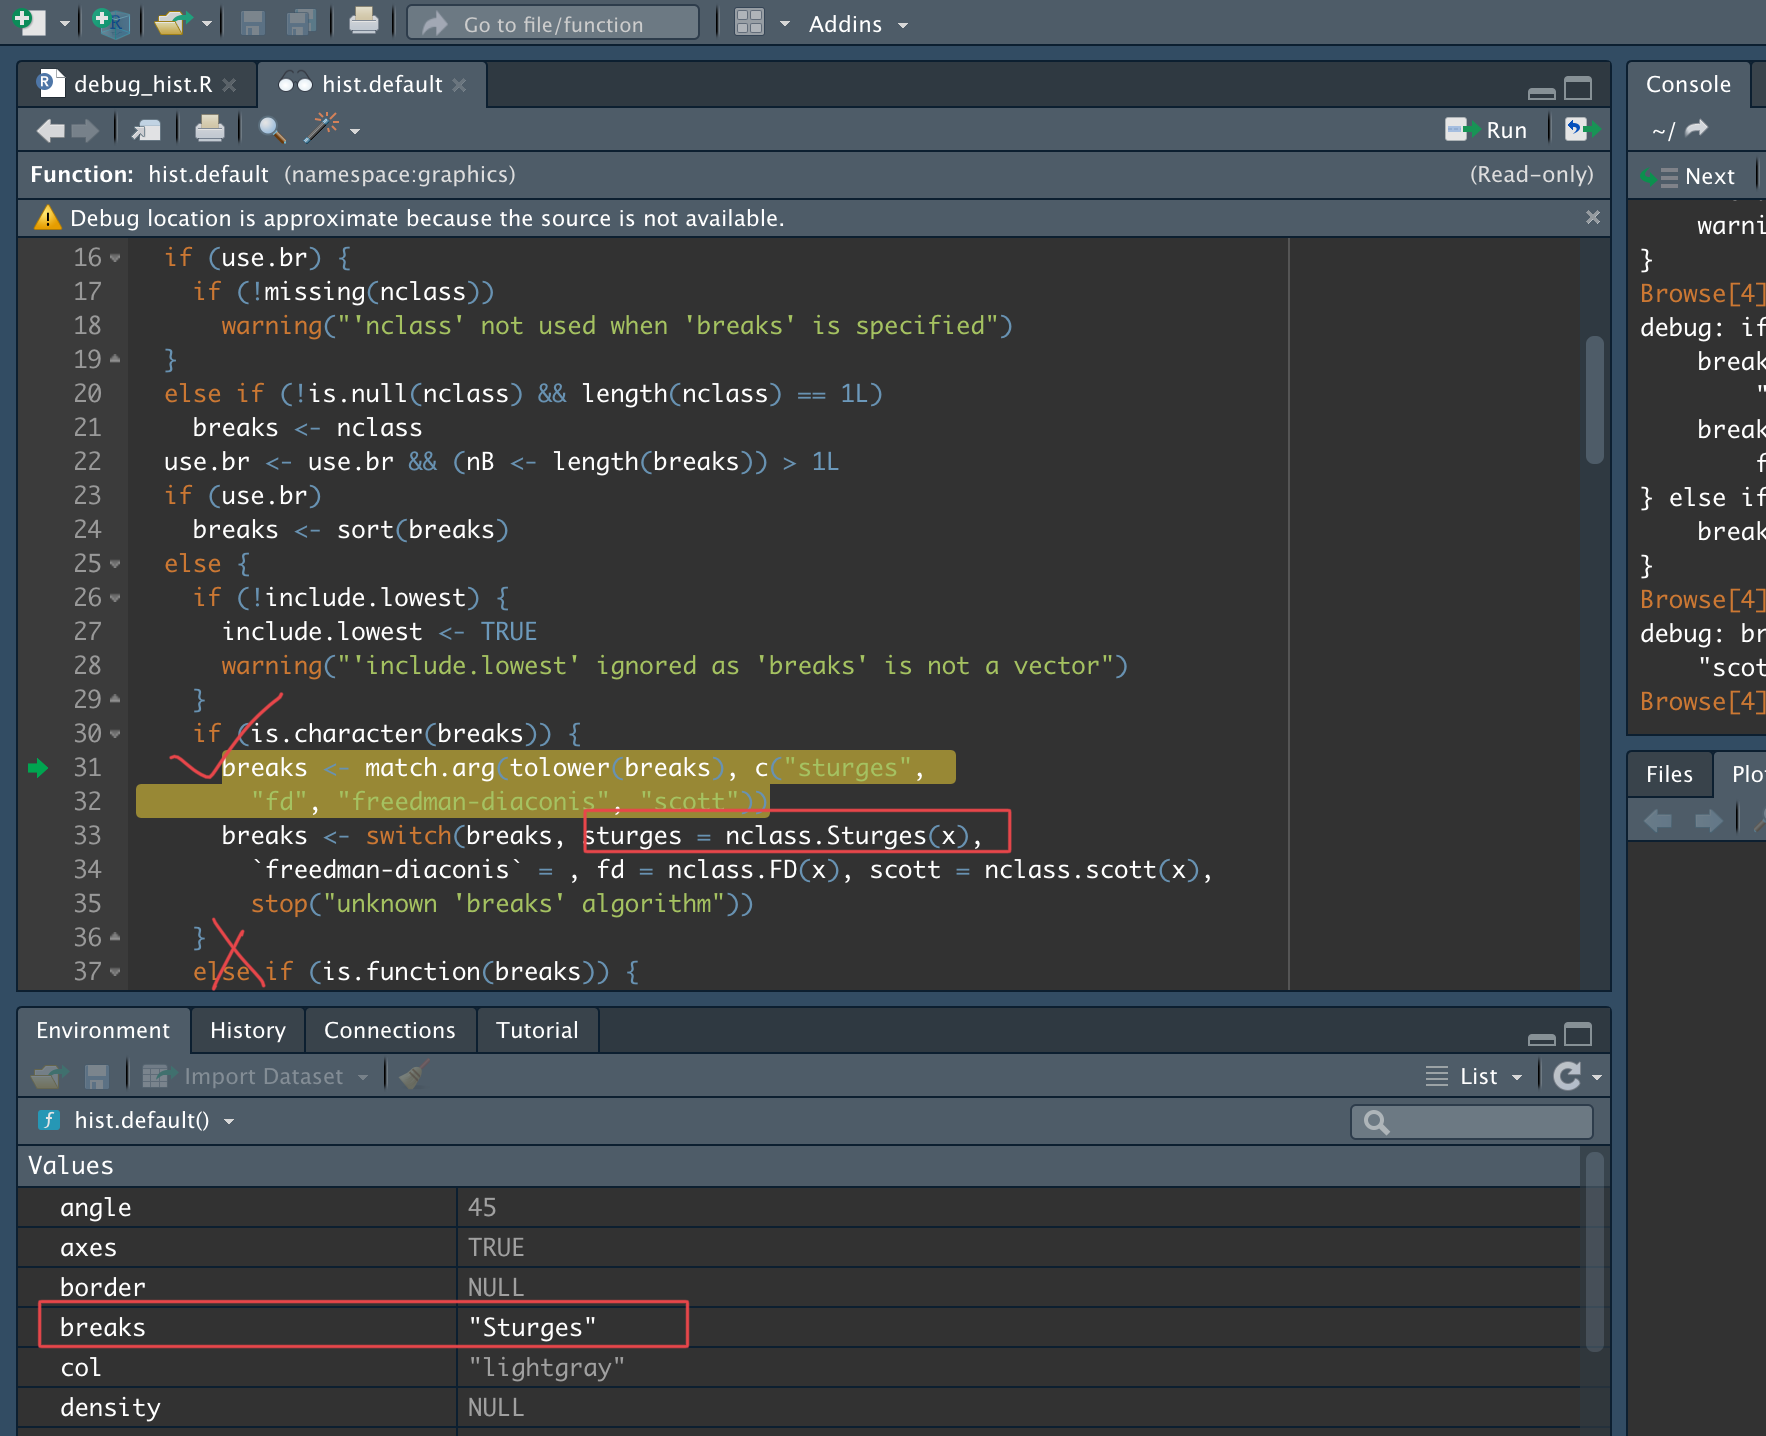
We can clearly see that the value of variable breaks is “Sturges” and the code goes into if instead of else if. And we can see that in the next two steps this will happen:
breaks <- nclass.Sturges(x)Now we get this:
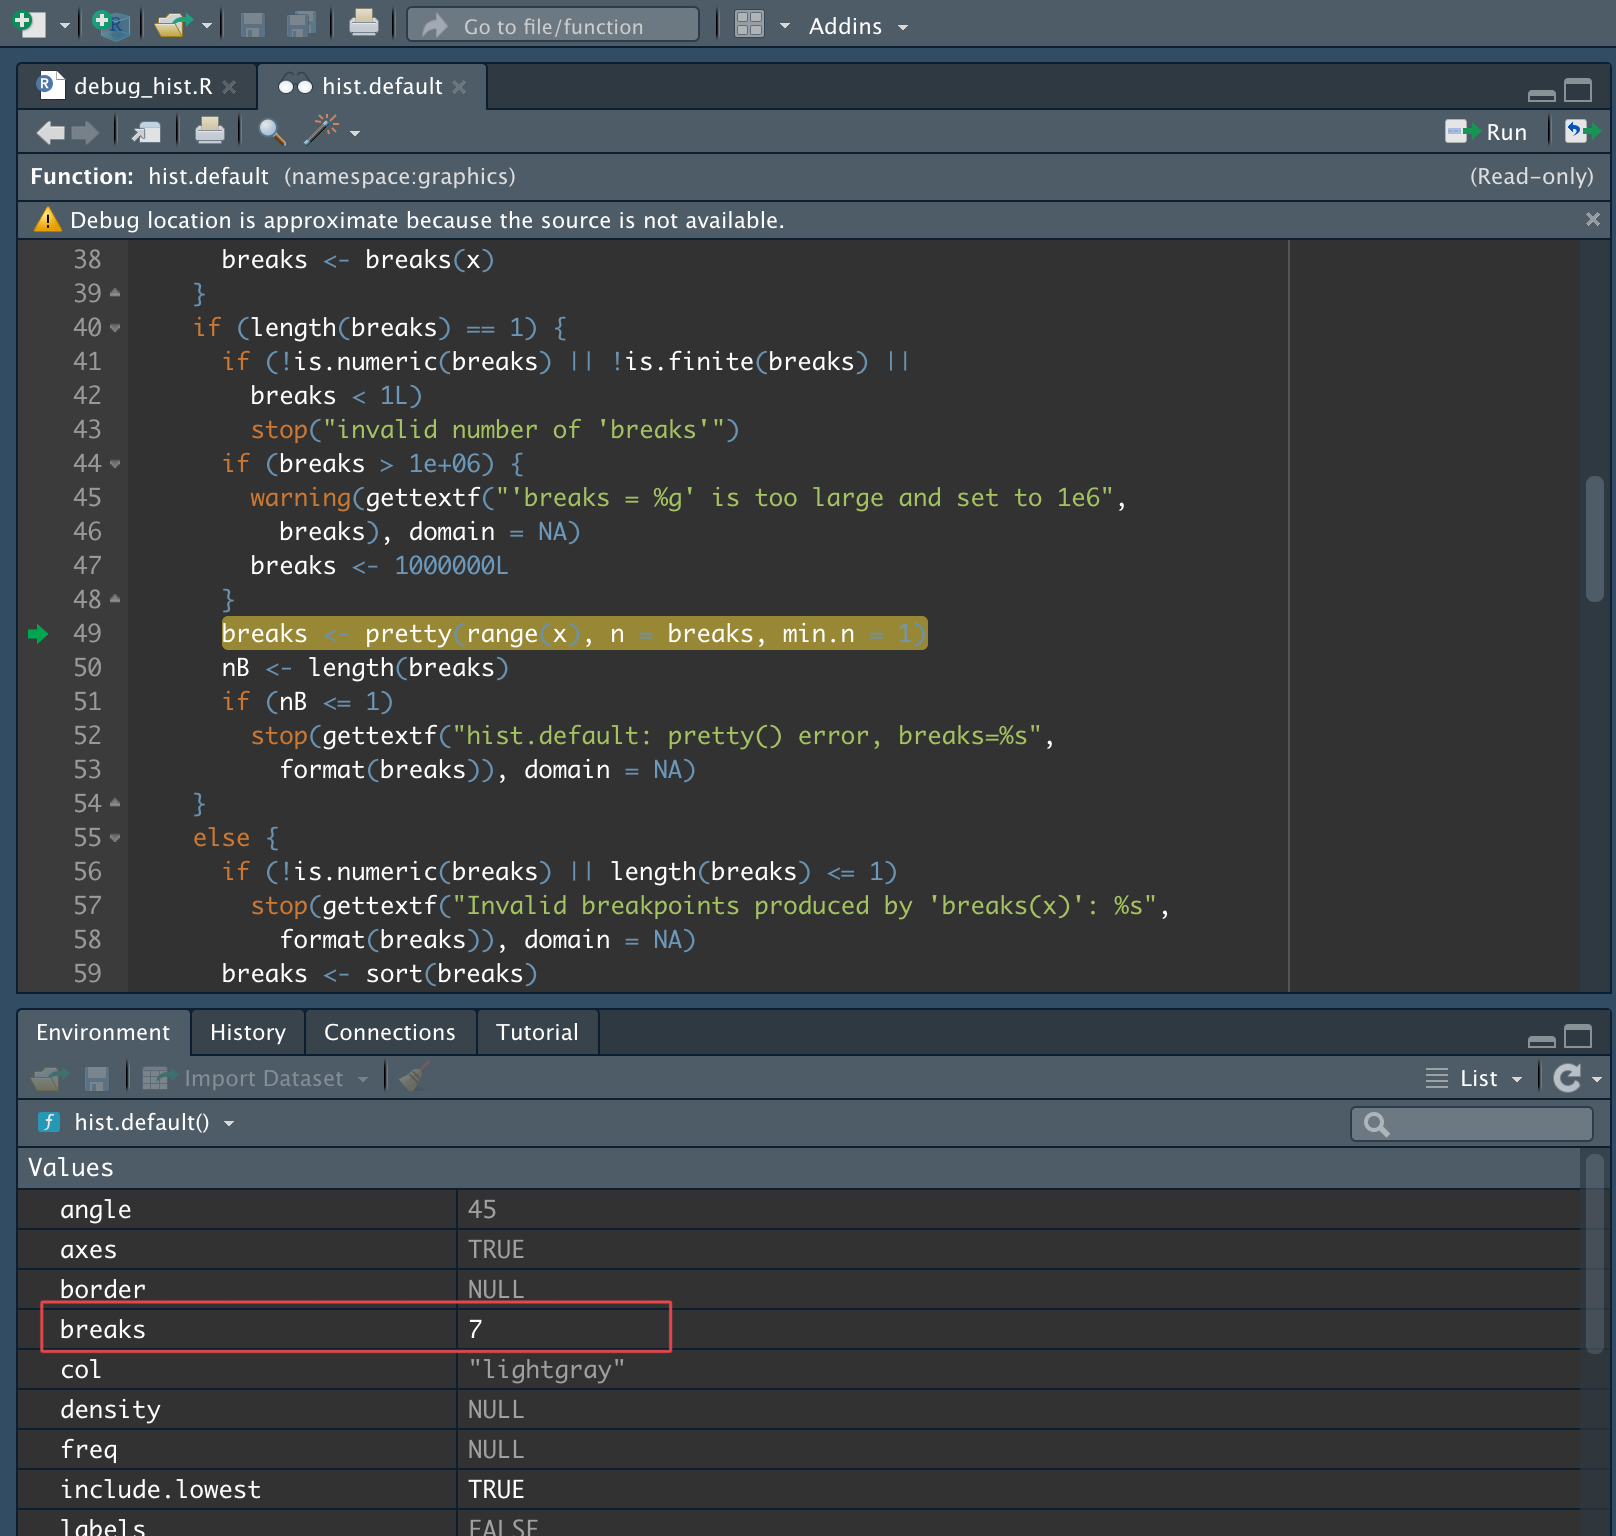
The value of breaks is 7 and in the next step it will execute
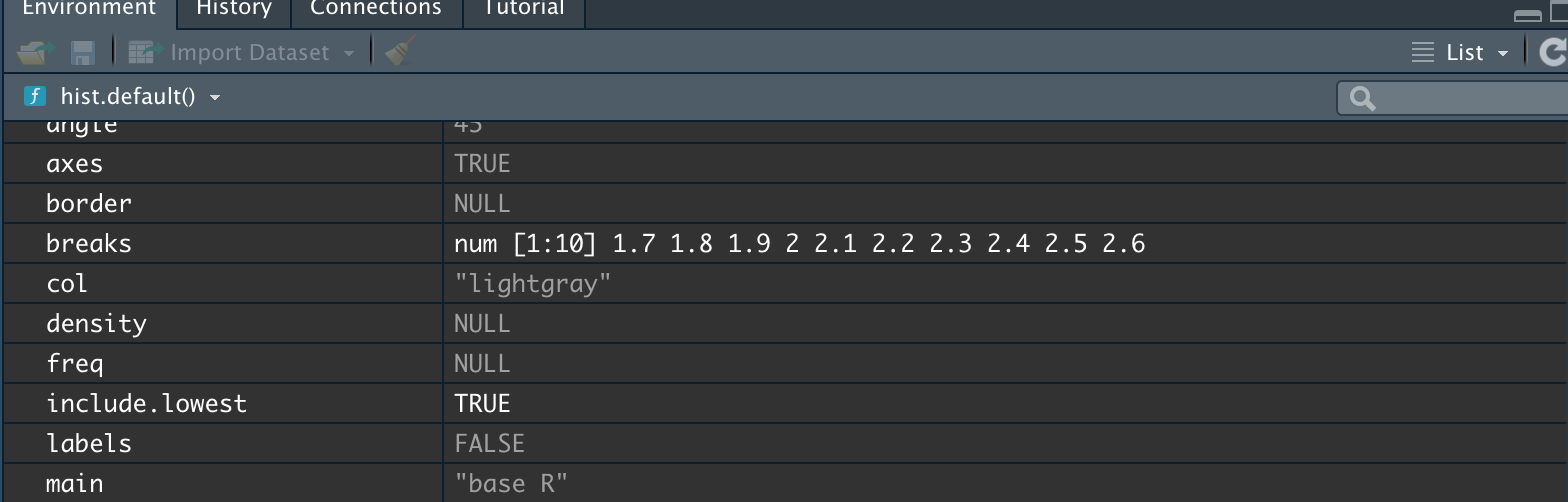
Finally we get the result of breaks:
78.4.4 summary
After we debug the script, we can understand how hist() determines breaks:
breaks <- pretty(range(mtl$asubic), n = nclass.Sturges(mtl$asubic), min.n = 1)
breaks
## [1] 1.7 1.8 1.9 2.0 2.1 2.2 2.3 2.4 2.5 2.6Now you may want know how pretty() works. Using debugging tools introduced above, you will find this:
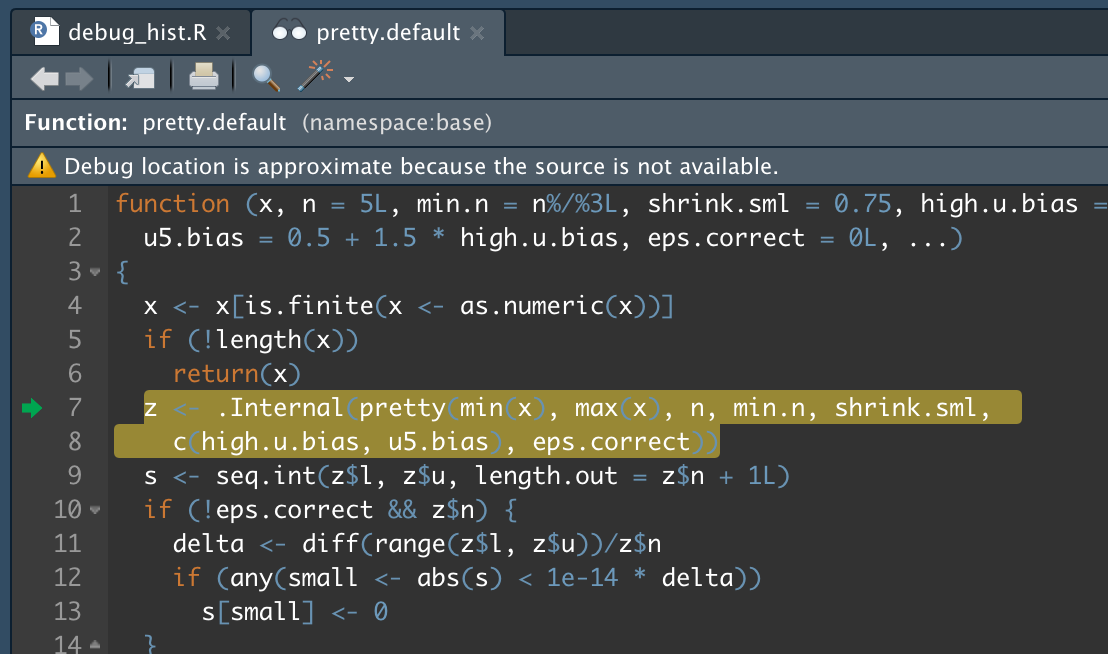
Unfortunately, .Internal(pretty(...)) is compiled in C. It is beyond this class and the tutorial, if you want to know more, you can visit this: https://stackoverflow.com/questions/14035506/